How to Change the Flooring in a Photo of Your Room
 David Sirera
 The short answer: you can change the flooring in a photo of your room by uploading two images to RoomLab.app: the room as it is today, and a photo of the flooring you are considering. Pick Floor as the surface, generate, and the Replace Material tool lays that flooring across your real floor while the walls, cabinets, furniture and light stay where they are. Below are the exact steps, two real before and after examples, and the things the result cannot tell you.
Most people searching for this are standing in a store, or scrolling a flooring site, holding a sample the size of a paperback and trying to picture it across a whole room. A small sample hides the two things that decide whether you will like a floor: how the color reads next to your cabinets and walls, and how the pattern looks when it repeats across several meters. Seeing it in a photo of your own room answers both before you pay for materials or installation.
Key takeaways
- You need two photos: one of the room, and one of the flooring you want to try. The flooring photo can be a product image from any store or a phone photo of a physical sample.
- Only the floor changes: RoomLab.app's Replace Material tool swaps the surface you pick and leaves cabinets, furniture, rugs and walls in place.
- It works across materials: the two examples below go from beige ceramic tile to gray stone-look tile in a kitchen, and from carpet to dark herringbone wood in a bedroom.
- Treat it as a visual check, not a spec sheet: the AI decides the tile or plank size from the sample photo, and screen color is not the same as the real product. Confirm both with a physical sample.
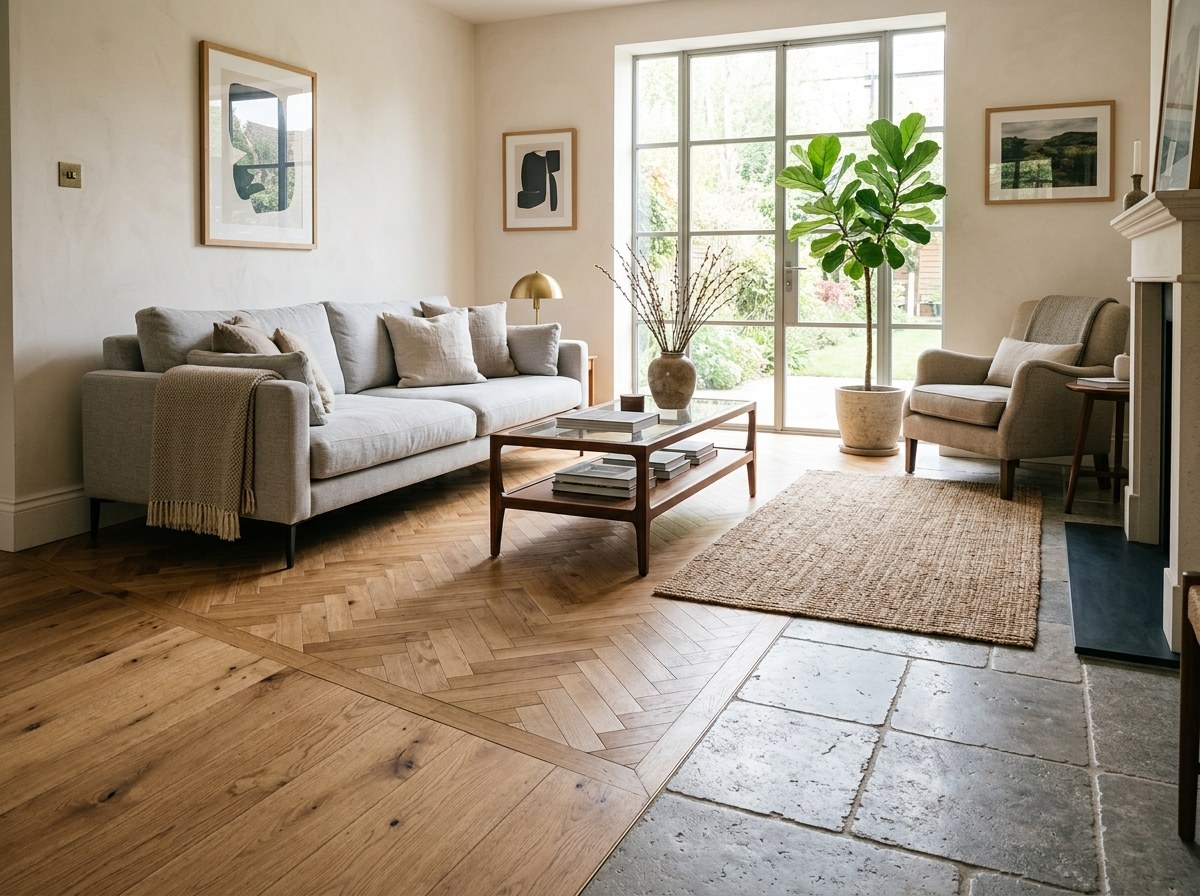
How do I see what flooring will look like in my room?
Take a photo of the room, find a photo of the flooring, and let an AI tool that edits surfaces combine the two. That is the whole idea. What separates a useful result from a pretty one is whether the tool keeps your room intact. A room generator will happily give you a nice floor in a different room with different windows. A material replacement tool starts from your photo, finds the floor, and changes only that.
That is how Replace Material works in RoomLab.app. You tell it which surface to retexture (floor, walls, rug, curtains, countertop or backsplash), give it the new material as a picture, and it applies that material to that surface only. The same tool handles walls and countertops, so if you are planning more than a floor, our guide to visualizing a renovation before you start covers the wider process.
How do you change the flooring in a photo, step by step?
The steps below are the ones in the RoomLab.app workspace today. The first try takes a few minutes, mostly spent finding a good flooring photo. Each try after that takes about a minute.
Step 1: Photograph the room so the floor is visible
Stand in a doorway or corner and hold the phone at chest height, tilted slightly down, so the floor fills at least the bottom third of the frame. Shoot in daylight with the lights on. The AI can only replace floor it can see, so a photo that shows mostly walls and ceiling gives it very little to work with. If the floor is covered in toys, laundry or boxes, clear them first or run the photo through Declutter Room before you start. Replace Material swaps the surface; it does not tidy what sits on it.
Step 2: Get a clean photo of the new flooring
This is the step that most affects the result. Use a flat, straight-on image of the flooring alone: a product swatch from the retailer's website, or a phone photo of a physical sample laid on a table in daylight. Avoid lifestyle shots with furniture in them, heavy shadows, or photos taken at a steep angle. A color cast or glare in the sample can carry over into the floor.
Step 3: Open Replace Material and upload both images
Open the RoomLab.app workspace, choose Replace Material, and upload your room photo. Then add the flooring image under New Material. Both images are required; the Generate button stays disabled until you have added them.
Step 4: Pick Floor as the surface to retexture
Under "Pick a surface to retexture", choose Floor. If you have a rug and want to keep it, leave it; the rug is a separate surface and stays in place. You can also open Additional Instructions (Optional) and add a short note in plain words, such as "planks running toward the window" or "matte finish", if the sample alone does not say it.
Step 5: Generate, compare, and try the next option
Generate and use the before and after slider to check the edges: along the cabinets, under the furniture legs and at doorways. Then run the same room photo with your second and third flooring candidates. Comparing three floors in the same room, from the same angle, is where this is most useful: the differences in tone and scale become obvious in a way they never are with samples in your hand.
What does the result actually look like?
Here are two real RoomLab.app inputs and outputs from our examples library, run through Replace Material with Floor selected and no extra instructions. Nothing was retouched afterwards.
Kitchen: beige ceramic tile to gray stone-look tile
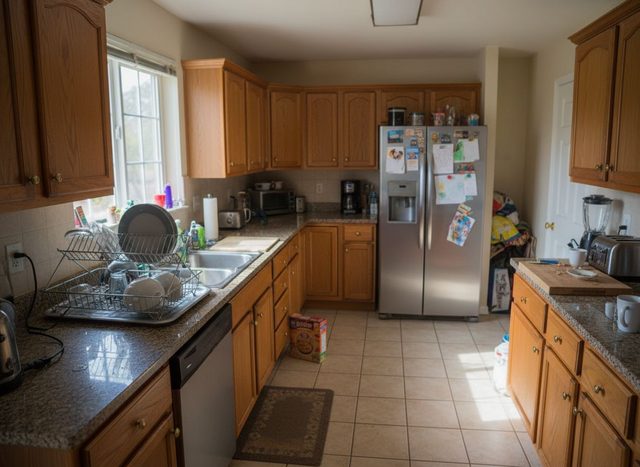
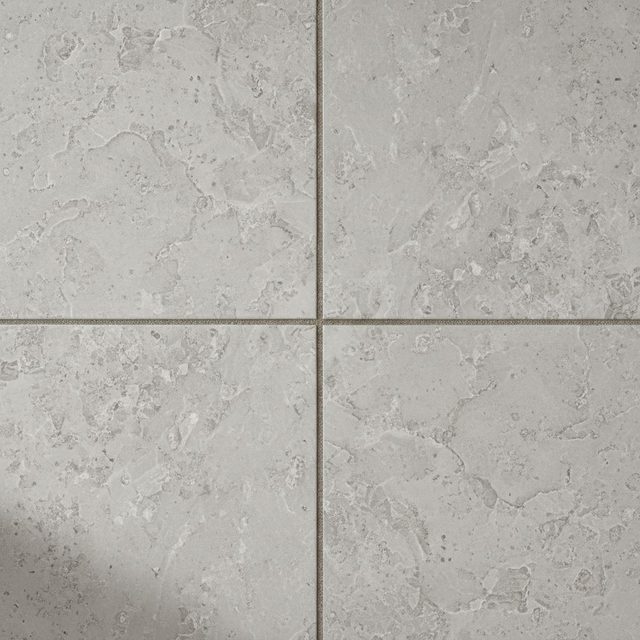
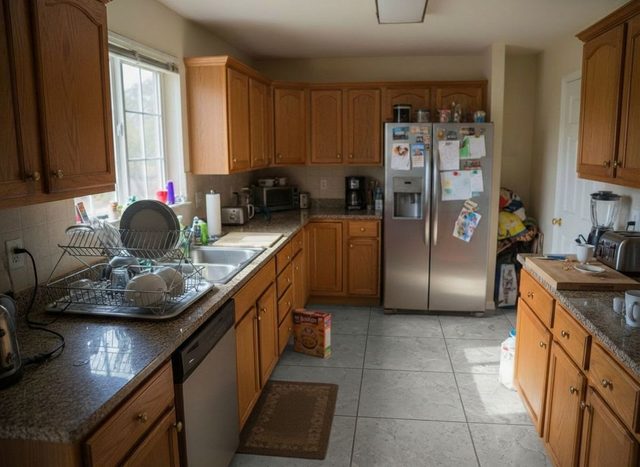
What held: the oak cabinets, granite, refrigerator with its magnets and drawings, the dish rack, the small rug by the sink and even the cereal box on the floor are all where they were. The new tile runs under the cabinet toe kicks and around the rug instead of over it. What changed the look: the cool gray sets off the warm oak, where the old beige tile blended into it. The honest limitation: the sample photo shows four tiles with nothing to give them a size, so the AI chose the size itself. Here it laid them noticeably larger than the original tiles. That may or may not match the product you buy, so check the scale against something you know, such as the width of the dishwasher, before you judge the look. See the full kitchen floor example with its slider.
Bedroom: carpet to dark herringbone wood
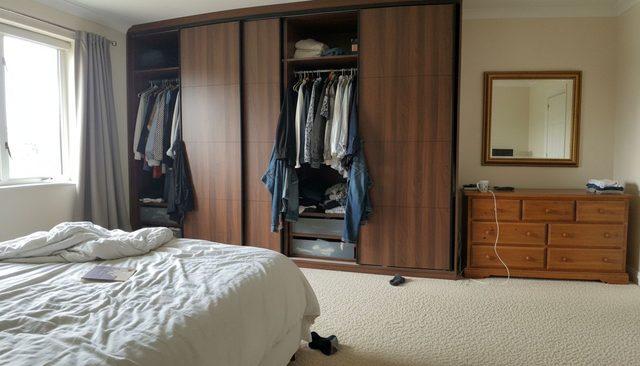
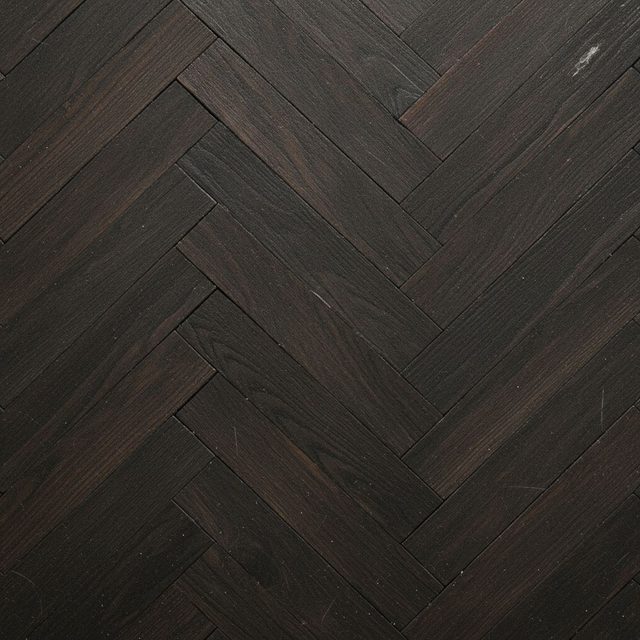
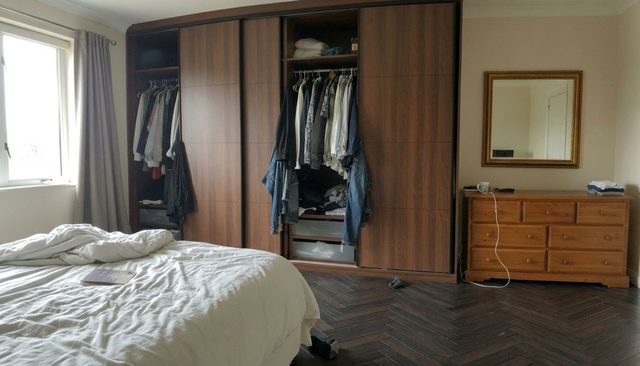
What held: the wardrobe, bed, chest of drawers, mirror and curtains are untouched, and the herringbone follows the room's perspective toward the far wall instead of sitting flat like a sticker. Carpet to hard flooring is the change people most want to preview, because it alters how the whole room feels, and here the dark wood makes the pine chest of drawers stand out far more than the cream carpet did. The honest limitation: the shoe and the charging cable on the floor are still there, now sitting on wood. Replace Material changes the surface, not what is on it, which is why Step 1 says to clear the floor first. The bedroom floor example shows it full size, and there is also a small bathroom going to hexagonal mosaic tile if you are planning a bathroom.
Can I change the floor in a photo with a flooring store's visualizer instead?
Yes, and if you have already chosen a store, try its visualizer first. Several large flooring retailers offer room visualizers where you upload a photo and try their floors. They are built to sell that store's range, which is useful when you are choosing between its products, because every result maps to something you can order.
A material replacement tool fits a different situation: you are comparing floors from different stores, you have a physical sample from a local supplier, or the product you like is not in any visualizer. Because RoomLab.app takes any flooring photo as the New Material, it does not matter where the flooring comes from. The tradeoff is that it will not tell you a product name, a price or how many boxes to buy.
What can't a flooring photo edit tell you?
It shows you how a floor looks in your room. It does not replace a sample, a measurement or an installer. Keep these limits in mind before you order:
- Exact color. Phone cameras and screens shift color, and so do product photos. Use the result to narrow the choice to one or two options, then bring home physical samples and look at them in the same light.
- Tile and plank size. As the kitchen example shows, the AI infers the scale from the sample photo. If size matters, say it in the instructions ("large 60 cm tiles") and check the result against a known object.
- Texture and feel. A photo cannot tell you whether a finish is slippery, cold, soft underfoot or easy to clean.
- Quantity and cost. The image does not measure the room. You still need the floor area and a waste allowance from your supplier or installer.
- Transitions and thresholds. Where the new floor meets a hallway, a step or another room is a construction detail the photo edit does not plan.
What else can you change in the same photo?
Once the floor is settled, the same room photo can take the next decision. Replace Material also covers walls, countertops and backsplashes, so you can check a new floor against a new wall color in one image. If a piece of furniture now looks wrong on the new floor, Replace Furniture swaps a sofa, bed or table for a product photo of the one you are considering, and the new floor stays as it is. Click Use as Input on a result to keep editing it, and you can build up a complete plan one change at a time.
Frequently asked questions
How do I see what flooring will look like in my room?
Upload a photo of the room and a photo of the flooring to RoomLab.app's Replace Material tool, choose Floor as the surface and generate. The tool lays the new flooring across your real floor and keeps the walls, furniture and lighting from your photo.
Can I use a picture of a flooring sample from a store?
Yes. A product swatch from a retailer's website or a daylight phone photo of a physical sample both work. Flat, straight-on photos without furniture or strong shadows give the most faithful result.
Can I find my flooring using a picture?
Not with RoomLab.app. It shows a floor you give it in your room, but it does not identify the product in a photo or look it up in a catalogue. To identify an existing floor, ask a flooring store or use a retailer's own visualizer or search tools.
Is there a free floor visualizer?
Several flooring retailers offer visualizers at no cost for their own products. RoomLab.app works with flooring from any source and runs on credits, so check the plans page for current pricing before you start.
Will it keep my rug and furniture?
Yes. With Floor selected, Replace Material changes only the floor surface. Rugs, furniture and anything else sitting on the floor stay in place, which also means clutter stays, so clear the floor before you take the photo.
Ready to Transform Your Space?
Start creating stunning room transformations in minutes. Sign up and try it yourself!
More Articles
SketchUp and 3D Model to Photorealistic Render With AI (No V-Ray)
SketchUp AI render without V-Ray: export a view or an OBJ, FBX or GLB file, upload it, set the lighting, and see two real before/after results.
10 min read

Is Virtual Staging Legal? MLS Disclosure Rules in 2026
Yes, virtual staging is legal everywhere in the US, but a growing number of MLSs and a new California law require you to disclose it. Here's what's actually required and how to stay compliant.
8 min read
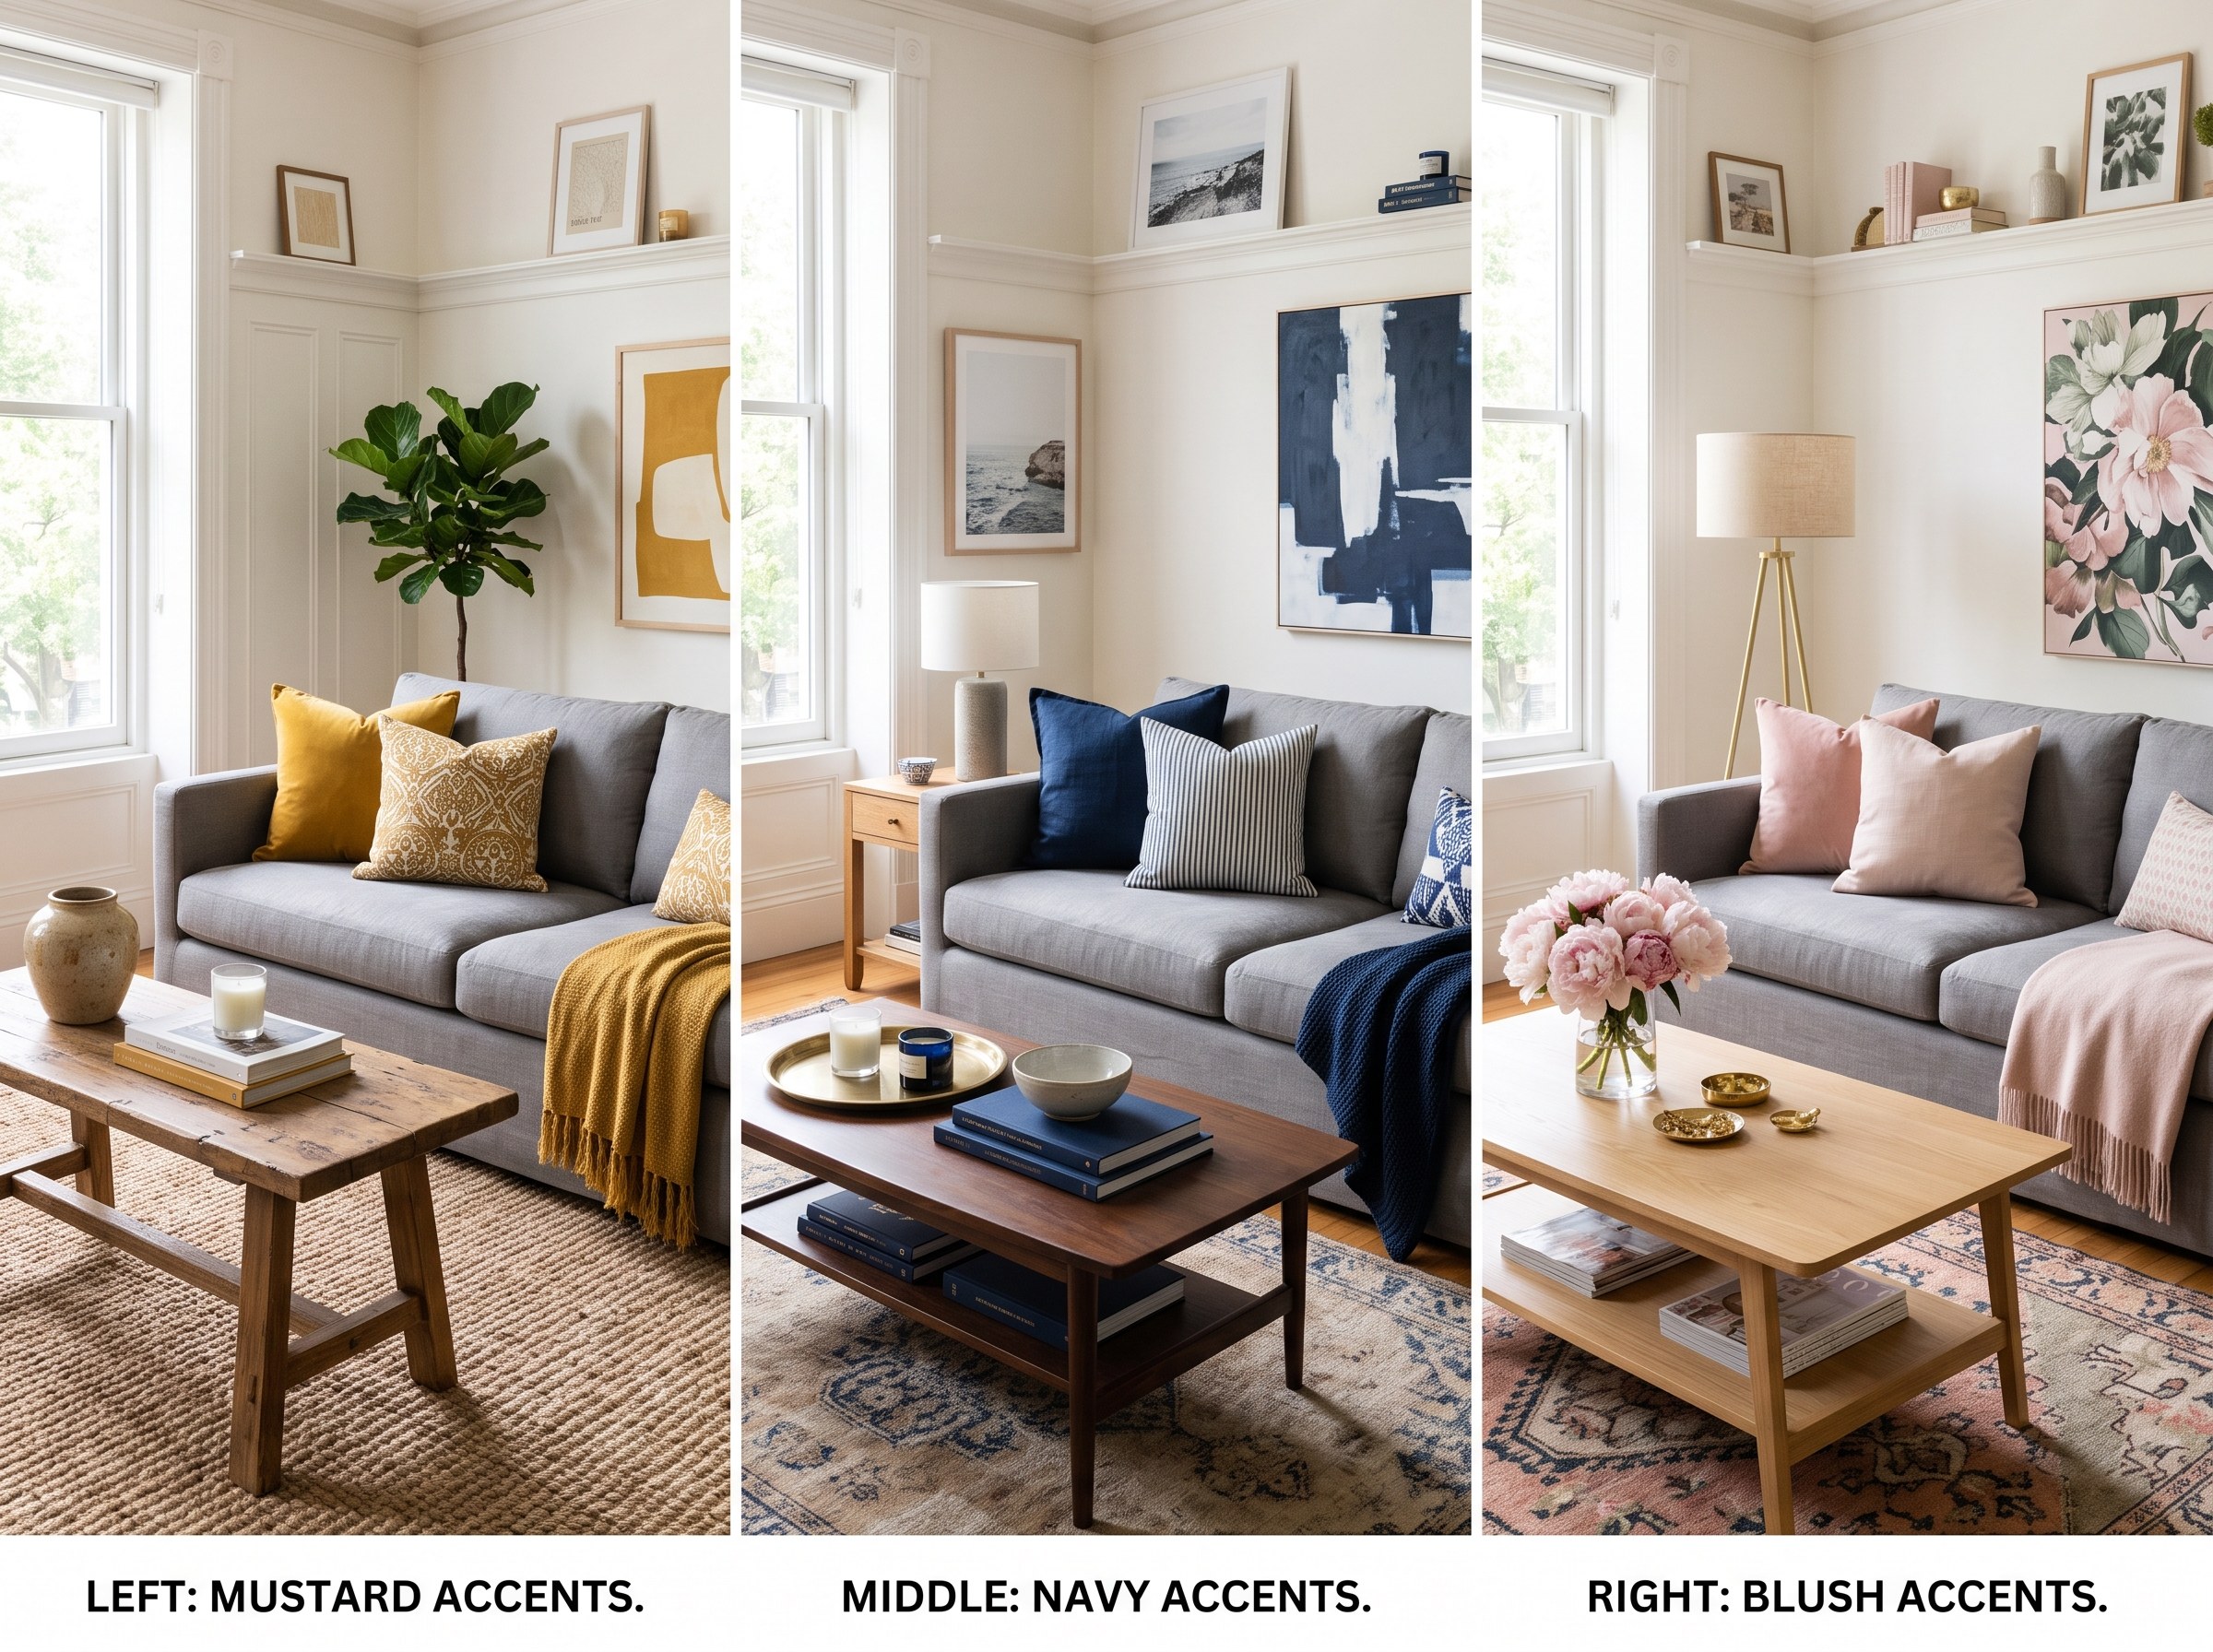
What Colors Go With a Gray Couch (With Real-Room Previews)
Mustard, navy, blush, terracotta, sage: the colors that pair well with a gray couch, plus how to preview any combination on a photo of your own living room before you buy anything.
9 min read